
The Complete Winterberry Holly Care & Planting Guide
Published: 01/12/2022 | Updated: 31/03/2023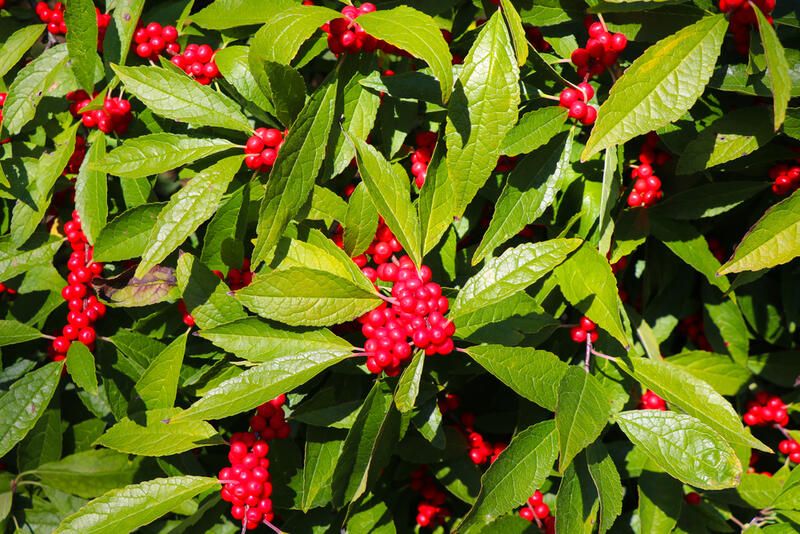
There's always a warm feeling in the coldest of winters when it comes to nostalgic plants and holidays. From the evergreen tree being cut down and strategically placed in such a way, you can't help from feeling glee to the winter holly berries covering doorsteps and stockings.


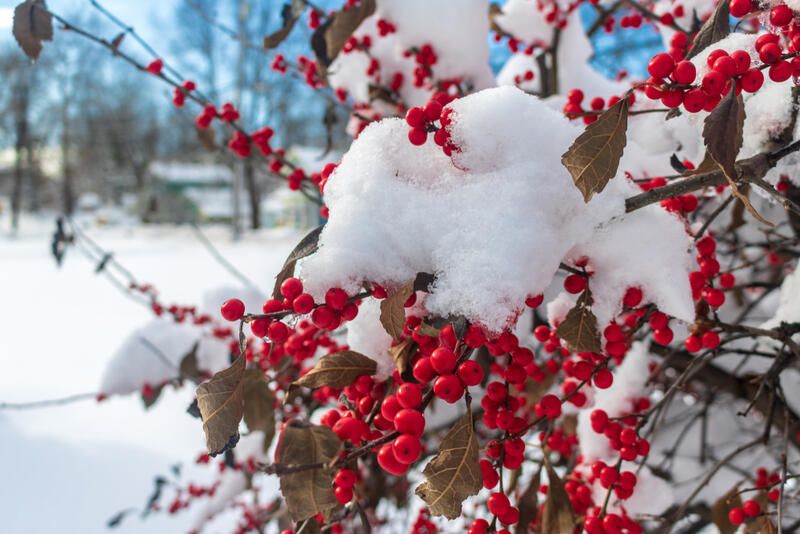
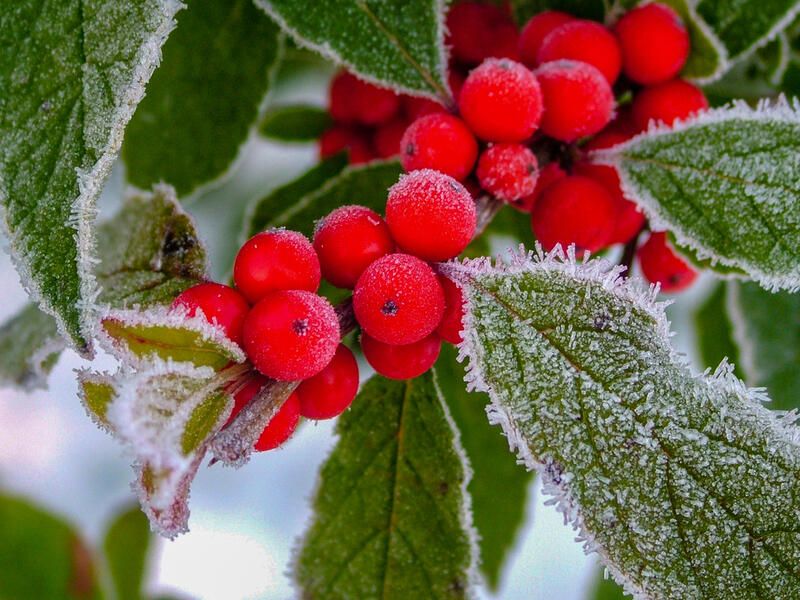
Well, the name isn't a coincidence. The winterberry holly is a native to the eastern United States deciduous shrub. Since it produces beautiful red berries that last throughout winter and into spring, it makes a wonderful addition to the landscape.
These beauties are an irresistible addition to any garden landscape, and we've put together the complete guide to caring, growing, and enjoying the jack frost classic, the winterberry holly.
General Info for the Winterberry Holly
What is a Winterberry Holly Plant?
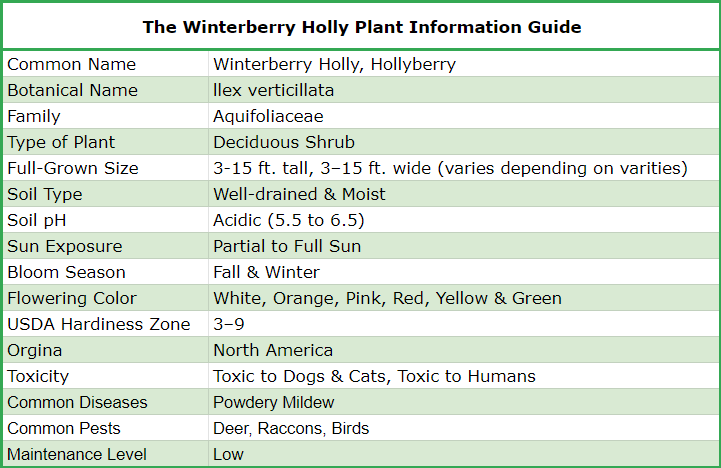
Native to the eastern United States and Canada, the winterberry holly grows happily along ponds, streams, rivers, and swamps in damp, acidic soil with a pH of 3.5 to 6.
This species is a member of the Aquifoliaceae family, which only has the holly genus Ilex as a member. The majority of the temperate and subtropical regions are home to plants in the genus Ilex, which are either evergreen or deciduous shrubs or trees. The berries are noticeable, especially in the case of ilex verticillata, whereas the blossoms are tiny and barely perceptible.
Other popular names for the plant include black alder, common winterberry, and Canada holly (though ilex verticillata is not related to alders).
The medium-sized shrub, winterberry holly doesn't grow much taller than 15 feet (4.5 m.). The crown is sturdy and spreading, with a smooth, beautiful, gray-to-black bark. The branches have a zigzag growth pattern and are relatively thin.
Male Plant vs. Female Plants
Dioecious (from the Greek "two households," dye-oh-ee-shus) plants include winterberry holly. In other words, only one kind of flower is produced by each particular plant:
-
Those which will become berries (a female plant)
-
Those who disperse pollen (a male plant)
This means that to have a stunning winterberry holly with berries, you must plant both a male pollinator and a female. Since male hollies seldom produce berries, they aren't particularly showy. Fortunately, you only need to plant one for up to five female plants to receive pollination. You can utilize your prime real estate for the showy female (or females) and tuck the male plant in a hidden corner of your landscaping because the male and female plants can be planted anywhere within about 50'/15.25m of one another.
Choose a female plant with the traits you want if you want to plant winterberry holly in your yard.
-
Berry size or quantity
-
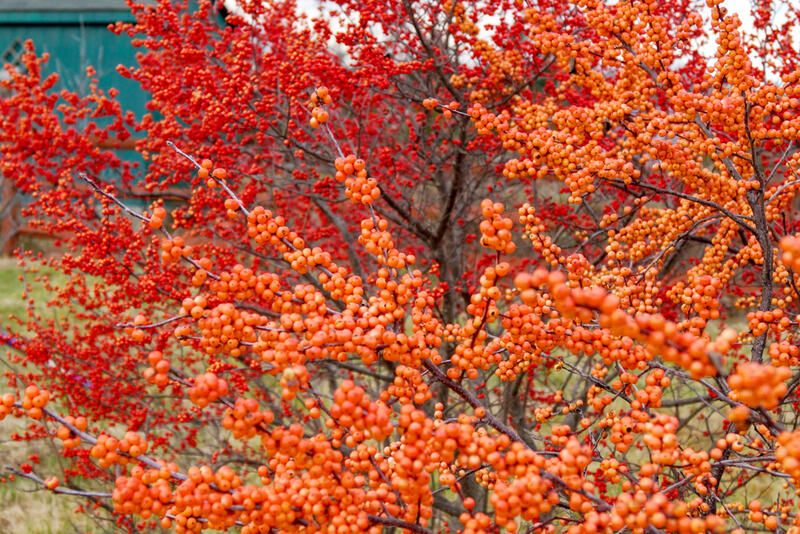
Bright red or gold berries' color and/or a comparison of plants' sizes
Check the tag to see which male variety will be compatible after choosing whatever female variety you desire. That advice will be based on the exact overlap of the two plants' flowering seasons.
Propagating Winterberry Holly Plants
I. verticillata can be propagated either by division or by cuttings. Here, we'll go over each of these approaches.
Although it is technically possible to cultivate the berries from seed, this technique can take years to create mature plants that bear berries. Additionally, you can get a lot of men and no women, or the opposite.
Additionally, trying to develop seeds from hybrid cultivars may leave you disappointed because these seeds' traits won't be true to those of their parent plant.
Using Cuttings
-
1: The ends of winterberry branches that are still green and bend easily should be cut into 6- to 8-inch stem portions. Bypassing the stem through your gloved thumb and index finger, you can remove the leaves off the lowest 3 or 4 inches of the stems. Cut each leaf horizontally through the center, trimming the upper leaves. Put the cuttings in a water-filled container or vase.
-
2: Vermiculite and coarse sand should be combined in a sterile garden tray in an equal ratio. Wet the planting media, then let it drip on the tray. To promote proper drainage and less mildew or mold issues, coarse sand is recommended. For the cuttings to sit in, make many holes in the planting media. Make the openings spaced apart enough so that the garden flat's leaves won't overlap.
-
3: To prepare a liquid synthetic auxin solution for softwood cuttings, follow the instructions on the product's packaging. When too much powder is used, talc-based auxins contain fungicides that could prevent root growth. Winterberry cuttings should be dipped in the solution for the bottom 2 to 3 inches before being inserted into the holes in the planting medium. To make the stems stand straight, firmly press the medium around them. Make sure the cuts are adjusted so that no leaves touch.
-
4: To create a tiny greenhouse for the cuttings, cover the planting tray with its lid. Place the tray away from direct sunlight in a well-lit area. Rooting of the cuttings could take one to three months. If the soil dries out, check the winterberry cuttings every day and wet the planting media with a spray bottle. Cut off any cuttings that seem sickly or lifeless.
-
5: After 30 days, check the winterberry cuttings for the development of roots. Check each cutting for some sort of resistance by gently pulling. You will know the roots have embedded into the planting media when you encounter resistance. Once a mass of roots has grown, remove the tray lid and keep developing the new winterberry plants. Put the cuttings into different pots or containers.
-
6: Grow the young winterberry cuttings either indoors or in a protected location of the garden until they are about 12 inches tall. If cultivating the plant outdoors, stake the area until the winterberry is visible as a component of the surrounding flora.
From Division
Winterberry division planting is also quite simple. Simply take a few suckers from each male/female pair and place them in little pots filled with acidic, well-draining soil. To begin, a 10" planter should be adequate.
If you want to lower the pH generally, think about utilizing peat moss and adding any supplements you desire. Do not let the soil dry up between waterings; instead, water daily to keep the soil moist. Before going all out and letting the plant dry out, it must first establish itself. Continue doing this so that the plant can get used to being outside. The procedure is quite similar to cutting-based propagation.
To control the harmful factors, you can also put up a microclimate outside. Until you notice fresh growth, keep the plant in its container. Then you know it's time to transfer them into the garden. If you're using biodegradable pots, simply excavate a space in fresh soil and insert the pots there.
Plant the winterberry approximately 8" deep and space the holes about 5 feet apart. If necessary, add plant supplements. To keep the plant warm throughout the winter, use straw mulch or leaf litter. When watering, make sure the soil is just slightly dry. As it becomes used to its new habitat in your garden, keep an eye on it.
Plant at least one male 30- to 50 feet away from your female plants. Thus, self-pollination will be possible. Keep in mind that you can also just leave the plants in their pots. You can do a delayed transplant if you don't want to translate them quite yet. Till the next spring, let them remain in their pots. Exactly as mentioned above, water and mulch.
Remove the bulbs and plant the root balls in their permanent location in the spring.
How to Care for Winterberry Holly Plants
It's time we get into the basic know-how for how to care for your winterberry holly plants.
Soil
Swamps, ponds, and other moist marshes are where the winterberry holly is found naturally. As a result, individuals perform best in familiar environments. Your garden's moist regions are ideal, but you should still have a drainage system in place to remove any extra moisture.
However, well-draining soil still triumphs over poorly-draining soil, which can result in powdery mildew and other plant fungi. This plant will survive with excess moisture present.
Pick acidic soils that are well-draining. While blending, add any vitamins or plant food. They prefer a soil ph of 5.5 to 6.4.
As long as you give winterberry a high-quality, nutrient-rich substrate so it has something to eat all year long, it doesn't care what kind of soil it grows in.
Light and heavy soils can also grow well; just make sure the soil is loamy, acidic, and rich in high-grade organic matter. Steer clear of neutral or highly alkaline soils.

Fertilizer
Select an acidic, drained soil. Add any vitamins or plant food while mixing.
Winterberry doesn't mind what kind of soil it grows in as long as you provide it with a high-quality, nutrient-rich substrate so it has something to eat all year long.
Both light and heavy soils can support healthy plant growth; just make sure it is loamy, acidic, and loaded with superior organic matter. Avoid neutral or extremely alkaline soils.
Temperature
There's no need to worry about harsh heat waves or freezing conditions because Winterberry can withstand a wide variety of temperatures. Unless your area is extreme.
Winterberry can withstand temperatures between -20F and those of a typical summer. These are resilient everywhere.
Humidity
Winterberry can endure a variety of humidity levels, much like it can handle a variety of temperatures. In most cases, there's no need to take action in response to outdoor humidity levels.
Consider watering the plant or establishing a microclimate to increase the humidity if there are prolonged dry spells.
Winter Care
Protect the roots from moisture over the winter. Moisture at the root weakens the root system and can cause rot, fungus, or other unpleasant issues with winterberries.
To keep it dry over the winter, you can add straw mulch, bark mulch, or even just plain compost leaf, just like you would with other flowering plants like baneberries or dewberries. The roots will be protected from temperature changes and kept warm as a result of this.
Consider spreading additional inches of mulch if you live in a region that frequently experiences cold spells. Use microclimates where you can.
Watering
Simple: only water the top 1-2 inches of soil when it becomes dry. Do not overwater. Although winterberry will put up with too much moisture, it is not advisable to overwater it as this might cause rot at the root level.
A slightly altered watering schedule is used for transplants. Add water every day until you observe fresh plant growth when you first plant transplants. Once you become aware of this, water less frequently and allow the soil to completely dry between applications.
Pruning
Only new growth, which is achieved by pruning, will produce flowers and subsequent berries. Before you notice any new leaves developing, the shrub has to be clipped in the spring.
Completely prune up to 30% of the branches. And then repeat this yearly. The oldest branches should be cut first, all the way to the ground. Only new growth, which is achieved by pruning, will produce flowers and subsequent berries.
Berry Covered Winterberry Holly Shrubs: Do's & Don'ts
It's as easy as having the right male, in the right ratio to the number of females, and planting them all in an area where they will grow and flower vigorously to get a beautiful, colorful winterberry holly. But there are a few reasons why certain shrubs, especially newly planted ones, might not bear fruit:
Mature Plants
The optimal time for winterberry hollies to blossom and bear fruit is when they are established, which occurs often after two to three years in the ground. Before producing their maximum amount of fruit, newly planted winterberries (and particularly very small plants purchased online) may require some time to form a strong root system and put on new growth.
No Male Plant
Berries won't grow on female plants if a male plant isn't nearby or if the male and female plants' bloom seasons don't coincide. The only surefire way to determine if your plants are male or female and which ones are which is to look at the blossoms when they bloom, which typically occurs in late May or early June in the Midwest (a bit earlier in warm climates, a bit later in colder areas). Male plants produce blooms with recessed cores and a crown of fluffy yellow pollen-bearing anthers, while female plants produce flowers with a raised green nub in the middle that develops into the berry. You are invited to contact us with images of the flowers if you are having trouble identifying them from the bouquets.
Stress
Your winterberry hollies may not form fruit or may drop any fruit that was starting to form if they are under drought stress. To keep plants from drying out too much in dry soils, make sure to give them plenty of water and a good 2-3"/5-7cm layer of mulch.
Not Enough Sun
Although winterberries can tolerate some shade, too gloomy circumstances can drastically reduce or even prevent flowering and fruiting. For the finest display, we advise getting at least four hours of daylight each day or using filtered light all day. As a result, a lot of flowers are produced, which promotes pollination (which is dependent on insects, who prefer sunnier climates), which in turn promotes fruit production. Early spring is the best time to transplant a winterberry holly that is in the excessive shade.
Pre-Bloomed Plants
If you just bought the plants, a grower or garden center probably kept them during the winter in a greenhouse. They blossom earlier as a result than plants that spend their winters outdoors naturally. As a result, it's possible that they bloomed before you bought them, and that pollination did not take place in those circumstances. As a result, the first winter after planting, new plants might not produce any berries.
Pests
If you simply purchased the plants, a garden center or grower most likely housed them during the winter in a greenhouse. As a result, they flower earlier than plants that naturally spend their winters outdoors. As a result, it's possible that they bloomed before you purchased them, in which case pollination did not occur. As a result, new plants might not bear fruit their first winter after being planted.
Greenish White Flowers & Berries
The tiny green berry grows and becomes rounder after being pollinated in late spring or early summer, but it retains its green color until early autumn. Up until they start to color, they are simple to miss.
Get to Planting!
You now know all the beginner steps to plant and take care of winterberry holly plants.
You will receive year after year's worth of vibrant red blossoms from these easy-to-grow plants. And they don't require much work. Are you ready to start planting?


